


At Infinity Dental Clinic we are very proud to receive referrals from fellow dentists to provide advanced dental care including treatment with dental implants.
We take great pride in building a close working relationship with our referring dentists and provide GDP’s with training and mentoring to allow them to complete many of these treatments within their own dental practices. With Implant dentistry, many of our referring dentists are now equipped with the skills required to restore the dental implants within their own practice. The benefit of this is that the patients are able to complete their treatment and ongoing care with their own GDP and also, the referring dentist is able to build their clinical skill set further to contribute to the Implant treatment and ongoing care in-house.
In this blog I will briefly discuss the stages of restoring a dental implant following the surgical phase.
Stage 1 – Implant exposure, gingival re-contouring
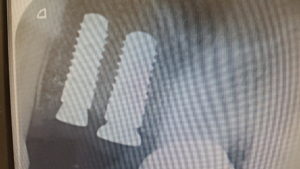
This stage is usually completed at 8-12 weeks depending on the surgeon’s advice. As a basic rule, if bone augmentation was provided at the surgical stage then we recommend waiting 12 weeks prior to commencing with this stage. A periapical radiograph should be available to help with identifying the precise location of the dental implant below the gingival level.
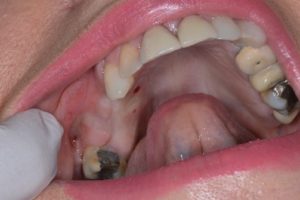
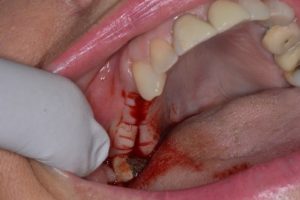
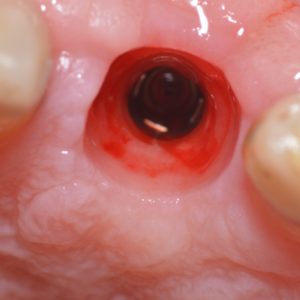
A simple incision can be made to expose the cover screw on the dental implant. In most cases a H-Shaped incision like in the picture can be used to create a soft tissue ‘trap-door’ to gain access to the cover screw. It is important to maintain keratinised tissue around the circumference of the dental implant, in particular the buccal side.
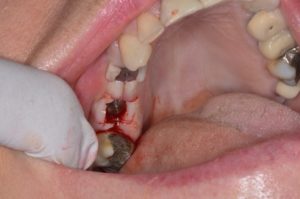
Once access to the cover screw has been gained it can be easily unscrewed and replaced with a ‘healing abutment’. This is available in a range of sizes and a suitable diameter and height must be selected so that the healing abutment is sitting slightly supra gingival. This enables soft tissue healing to occur in a manner that will enable the creation of an emergence profile as seen in the pictures below. This takes approximately 7-10 days to heal.
The creation of an emergence profile is critical for the production of an aesthetic and hygienic restoration. In the anterior (or aesthetic) zone, the emergence profile is created using provisional restorations in a process which is in itself a treatment phase. This will be discussed in detail in the next blog in this series.
Stage 2 – Impression taking
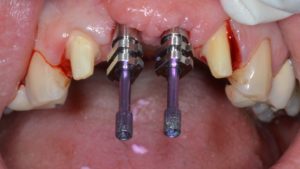
The healing abutment is removed and this will leave a nice emergence profile surrounded by healthy keratinised tissue. A special tray is made for impression taking at this stage. The lab is instructed to cut a hole in the area of the dental implant to produce an open tray. This will allow the practitioner to take an open tray impression which is widely recognised as the most accurate form of implant impression taking in most clinical situations.
The corresponding impression coping is screwed into the implant through the newly created emergence profile. The special tray is seated to ensure that the hole fits passively over the impression coping. Once this is verified, a rigid impression material is selected to take an impression as seen in the picture below. Either Impregum or a heavy bodied silicone is suitable for this. Once the material has set in-situ, the coping is unscrewed and the tray is removed.

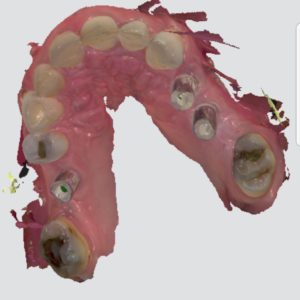
An optical impression can be taken as an alternative to the conventional impression technique described above. This is performed using a digital scanner to produce an impression like in the picture below.
Stage 3 – Fit
At our clinic we use the lab at Stephen Green’s Dental Studio. They will use the impression from stage 2 to cast up an implant analogue relative to the teeth in the upper and lower arches. A screw retained restoration is always the preferred option as it is retrievable for long term implant care and maintenance. Alternatively, a cement retained restoration can be fitted however, excess cement can easily extrude into the peri-implant regions which can potentially cause micro-inflammation and long term peri-implant problems.
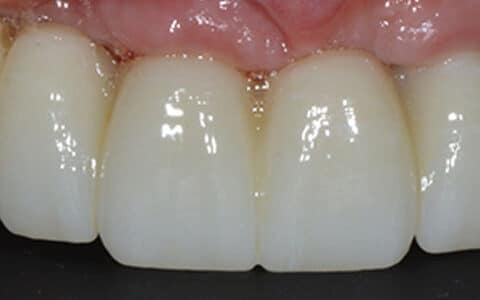
The restoration should comfortably seat fully onto the implant neck and this is confirmed with a periapical radiograph. The radiographs below demonstrate this.
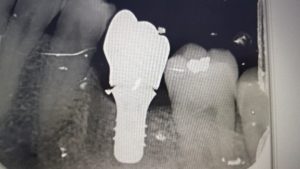
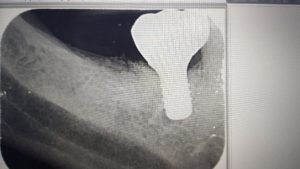
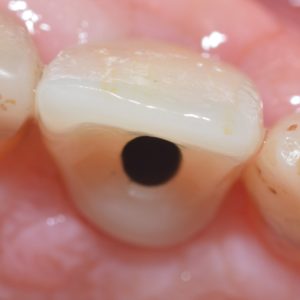
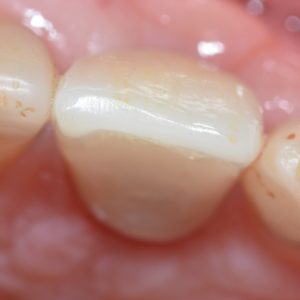
The restoration is usually torqued to 35ncm using the implant specific torque wrench and the access hole is neatly covered using a silver plug (or PTFE) and a composite resin restoration.
Thank you for reading. Please feel free to email me with any feedback, queries or for advice on mentoring.
Mohsin Patel BDS MJDF RCS (Eng)
Talk to us
Please fill out the form below with your enquiry or you can call us on 0113 2633199. You can even pop in to the clinic.
"*" indicates required fields
Related articles...
Growing together in education and development
At Infinity Dental Clinic we have always strived for excellence. Over the last 10 years, dentistry, just like many industries in the world, has seen a rapid rate of development…
13th April 2024
“I can’t stop smiling…”
This patient attended our clinic after having dentures fitted over 15 years ago. She had none of her own teeth and was relying on removable dentures to continue to live…
6th April 2024

It’s all about keeping it real…
Natural tooth replacements – that’s what it’s all about at Infinity Dental Clinic. This patient attended our clinic with her upper 2 central incisors failing due to localised periodontal disease.…
29th March 2024
A smile transformed in a day
I have found that one of the biggest concerns for patients is the thought of having no teeth – even if it is just for the duration of their treatment…
23rd March 2024
Book a Consultation
At Infinity Dental Clinic we see patients for routine dental check-ups with our dentists. Regular dental maintenance and good oral hygiene will ensure that you keep your teeth and gums healthy.
Book a Consultation