


If you have missing teeth, then fixed dental implants are often the best solution.
Dental Implants are the most natural replacement for your own teeth. Traditional dentures can often be loose and may not provide the same functions that natural teeth do. With Fixed dental Implants our patients are able to bite, chew, speak and laugh as they did with their natural teeth.
CASE EXAMPLE – DENTAL IMPLANT TO REPLACE 2 PREMOLAR TEETH
In this case we treated our patient to replace her missing 2 upper premolar teeth which is shown in the series of pictures in this blog.
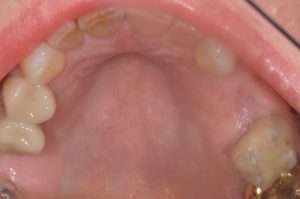
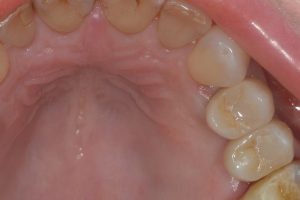
Step 1 – Following the removal of the broken and infected teeth, the gum is left to heal naturally for approximately 6 weeks. This enables the gum to heal over the extraction site completely like in the picture above (right side of picture).
Step 2 – A CBCT scan is taken using our in-house scanning facility during this healing period to assess the bone volume and the suitability of dental implant treatment for the patient. The CBCT scan is also used to plan the procedure with precise accuracy, making the procedure aesthetic, successful and safe.
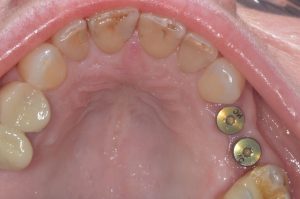
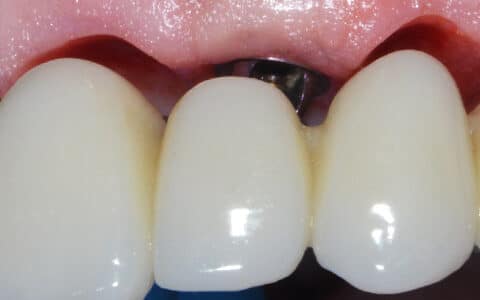
Step 3 – Using the information gathered from the pre-planning and CBCT scan, the implant is then placed at the 6 week stage. This is a skilled procedure undertaken by our implant team. The dental implant is carefully placed below the gum and left to heal naturally for approximately 3 months. This is the average time it takes for osseointegration to occur, which is the process of bone growth onto the implant surface. The picture below shows how the dental implant can look after 3 months of healing and osseointegration have ocurred.
Step 4 – A digital scan of the whole mouth and dental implant is taken at this 3 month stage.
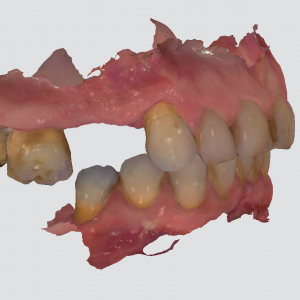
This is the most accurate way of gathering information and our digital scanner ensures that no conventional impression taking is required. The digital scanner allows us to manufacture a bespoke implant supported tooth to be as natural in appearance as is possible. The picture below shows how our skilled technical team make these teeth using the latest 3-d printers, ceramic technology and CAD/CAM.
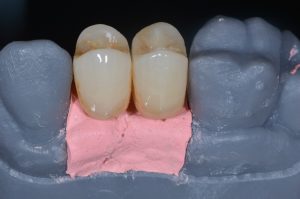
Step 5 – These aesthetic teeth are then screwed into the integrated implants in the mouth. This is usually done at month 3. Notice how the access hole is carefully positioned onto the biting surface of the tooth – away from the visible part of the tooth. This is only possible with skilled dental implant placement. By ensuring this ‘screw-retained’ type of tooth is made, we can easily maintain the long term health of the implant without every having to drill or damage the implant tooth in the future.
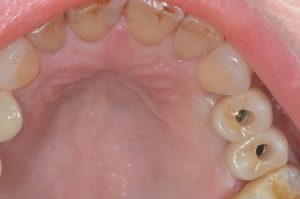
The access hole is carefully sealed using a matching tooth coloured composite as seen below.
This patient was delighted with her new teeth. They look and feel just like her original teeth, which is exactly what she wanted.
A Dental Implant has provided this patient with a tooth that not only looks natural, but will also feel and bite like a ‘real’ tooth. The Dental Implant procedure has not damaged her neighbouring teeth and will help to support her face to avoid the sunken appearance that can sometimes be seen in denture wearers.
Thank you for reading
Mohsin Patel BDS MJDF RCS (Eng)
Related articles...
Gums, Bone and Natural Dental Implants…
I completed the treatment for our patient this week to replace almost all of her upper teeth. She presented to our clinic with most of her upper teeth failing due…
20th April 2024
Growing together in education and development
At Infinity Dental Clinic we have always strived for excellence. Over the last 10 years, dentistry, just like many industries in the world, has seen a rapid rate of development…
13th April 2024

“I can’t stop smiling…”
This patient attended our clinic after having dentures fitted over 15 years ago. She had none of her own teeth and was relying on removable dentures to continue to live…
6th April 2024

It’s all about keeping it real…
Natural tooth replacements – that’s what it’s all about at Infinity Dental Clinic. This patient attended our clinic with her upper 2 central incisors failing due to localised periodontal disease.…
29th March 2024
Book a Consultation
At Infinity Dental Clinic we see patients for routine dental check-ups with our dentists. Regular dental maintenance and good oral hygiene will ensure that you keep your teeth and gums healthy.
Book a Consultation